Revit MCP setup guide
Connect Claude to Revit
This guide adds an MCP server to Autodesk Revit 2022, 2023, 2024, 2025, 2026, 2027, so Claude can read and change your live model when you ask it to. No coding, no Python and no config files: install the VI MCP add-in and the Claude app, open Revit, and the add-in connects them by itself. It works in both the Chat and the Code tab of the Claude app.
Before you start
- Windows 10 or newer
- An internet connection
- Revit 2022, 2023, 2024, 2025, 2026, 2027
- Your Revit project open
Which Claude plans work?
| Plan | Chat tab | Code tab |
|---|---|---|
| Free | ✓ Yes | — No |
| Pro | ✓ Yes | ✓ Yes |
| Max | ✓ Yes | ✓ Yes |
| Team | ✓ Yes | ✓ Yes |
| Enterprise | ✓ Yes | ✓ Yes |
VI MCP works in the Chat tab on every Claude plan, including Free. The Code tab needs a paid plan. On Team and Enterprise, your administrator can turn off connectors or the Code tab — if VI MCP does not appear, ask them to allow it. See Anthropic’s plans and pricing.
- 1
Download and install VI MCP
Close Revit. Download VI MCP from our download page, unpack the ZIP and run the installer inside. No administrator rights are needed.
Download VI MCPIf Windows shows “Windows protected your PC”, click More info, then Run anyway.
- 2
Install Claude for Windows
Open Anthropic’s download page and click Download for Windows. Run the installer from your Downloads folder and follow the on-screen steps.
Download Claude for Windows - 3
Sign in to Claude
Open Claude from the Start menu and sign in. If you plan to use the Code tab, open it once and start a session.
Do this before opening Revit — VI MCP can only connect to Claude once Claude has been opened at least once.
- 4

Open Revit
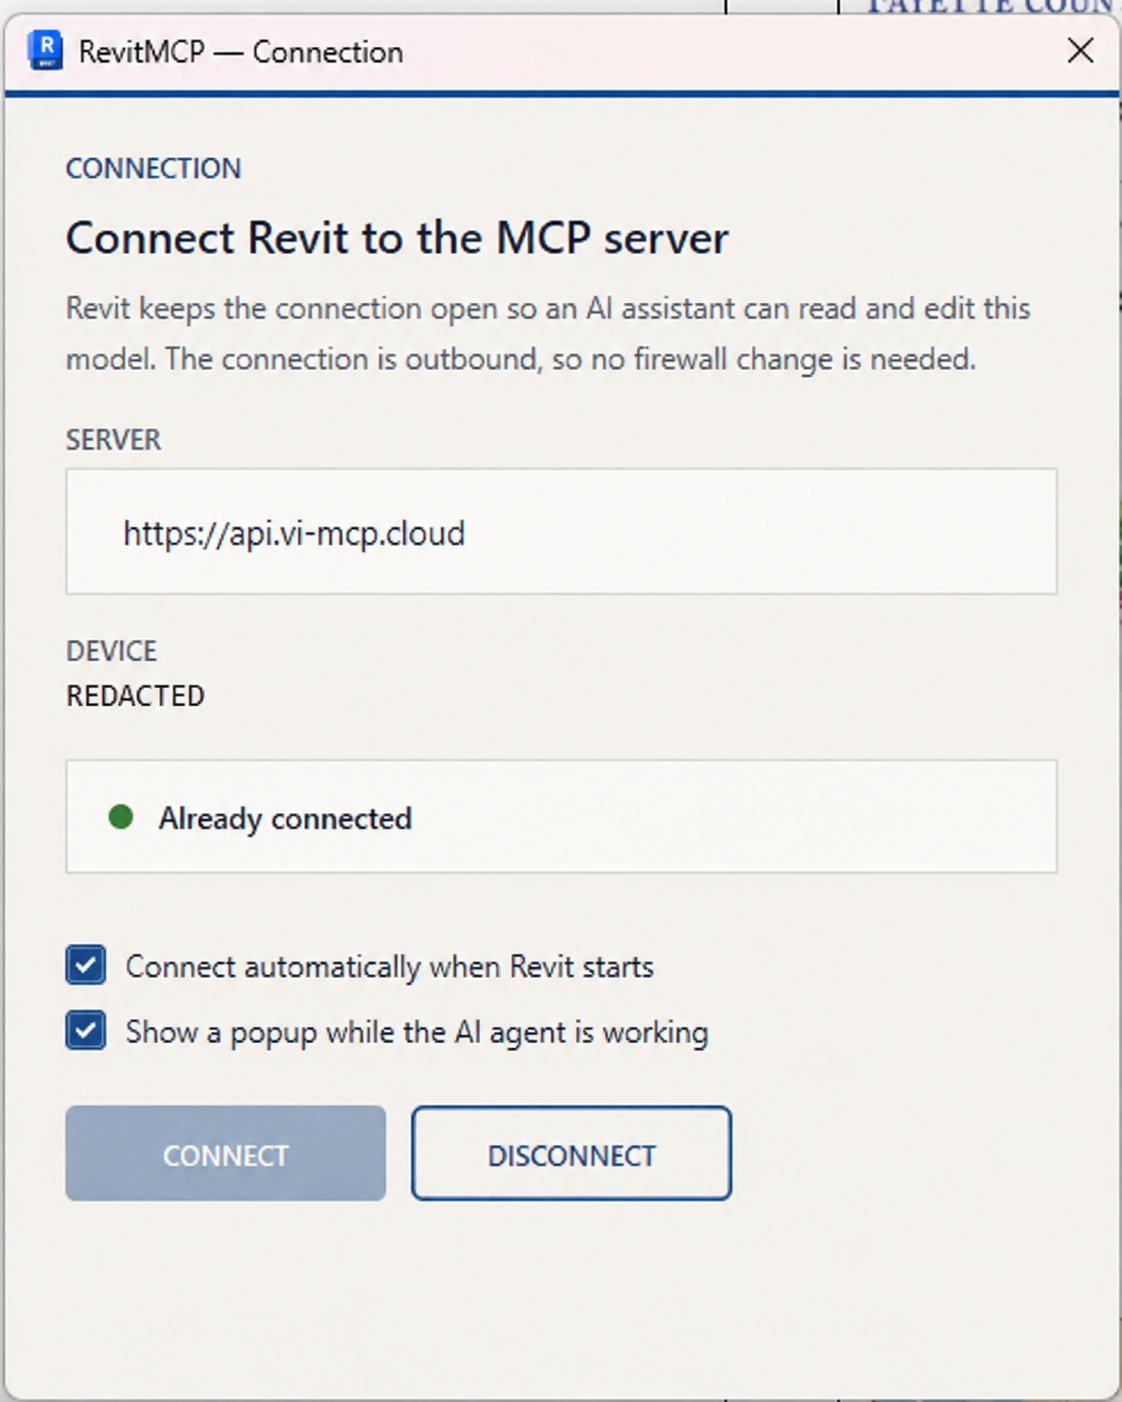
Open Revit and your project. VI MCP connects to Claude automatically every time Revit starts.
First time only: in the VI MCP ribbon panel, click Connect and wait for the green dot.
- 5
Restart Claude
Fully quit Claude — right-click its icon in the taskbar tray and choose Quit — then open it again. Closing the window alone is not enough.
- 6
Say hello to Revit
Keep Revit open and connected. Start a new chat in Claude and send:
Say hello to Revit using VI MCP.
When Claude asks for permission to use VI MCP, choose Allow. Claude replies with the name of your open project and view — you are ready to go.
Troubleshooting
If Claude cannot reach Revit
- Claude does not see VI MCP
- Make sure Claude has been opened at least once, then restart Revit (or click Connect). After that, fully quit and reopen Claude.
- Revit shows Disconnected
- Open the VI MCP Connection window and click Connect. Keep Revit and the project open while you work with Claude.
- The Connection window says “Open MCP Setup”
- Click MCP Setup, then Copy Instruction, paste it into the Code tab in Claude and send it. Then restart Claude. The instruction contains your private key — do not share it with anyone.
- Claude asks “Allow” before every action
-
Claude asks for permission each time it uses a tool until you allow VI MCP permanently.
Code tab: send Claude this message once:
Add mcp__revit-vi-mcp to permissions.allow in my user settings, so VI MCP tools run without asking.
Approve the change when Claude asks. From the next session on, VI MCP tools no longer ask for permission.
Chat tab: when the permission request appears, choose Always allow instead of allowing once. You can also change it later: click + in the message box, then Connectors → Manage connectors, select VI MCP and set its tools to Always allow. For tools that change the model, Claude Desktop may keep asking every time — if the option is greyed out, use the Code tab.
- The Code tab is missing
- Check that you are signed in with a Pro, Max, Team or Enterprise plan. On Team or Enterprise, ask your administrator to enable it. On the Free plan, use VI MCP in the Chat tab.
- Updating VI MCP
- Quit Claude and Revit before running the new installer.